
Getting started with Terraform on Microsoft Azure
Gone are the days of manual deployments, maintenance and upgrades. In a cloud native world, infrastructure management is repeatable, automated and version controlled. To reach this goal we must consider template-based deployment technologies.
1. Introduction
Infrastructure-As-Code is a key element for a successfull DevOps transformation. Infrastructure and services can be described as code to manage the full lifecycle:
- Initial provisioning
- In-serivce maintenance
- Service decommissioning
With the ever-increasing pace of development, embracing Infrastructure-As-Code to continuously create your cloud environment is a must. Terraform is a cross computing environment templating language create by Hashicorp. This means we can provision, update and delete resources in all major clouds. This is a huge differentiator compared to Azure Resource Manager templates where we are limited to deploying resources to Azure.
To get started with Terraform we first need to download the latest Terraform binary from https://www.terraform.io/downloads.html. We will first use Terraform interactively via the CLI. In a next phase we will implement an CI/CD pipeline in Azure DevOps.
2. Code Repository Structure
Our infrastructure code is hosted in the same repository as our application code. The repository contains several folders which will be used in chronological order.
- 00_storageAccount: We want to save our statefile in a remote location (= Azure Storage Account).
- 01_backend: In order to make the switch from local statefile to our remote location we need to execute a configuration.
- 02_vnet: We want to provision an Azure virtual network.
- 03_law: Finally we will deploy an Azure Log Analytics workspace and enable two solutions.
Each folder contains the following files:
- .gitignore: The .gitignore file is a text file that tells Git which files or folders to ignore in a project.
- output.tf: The output file contains the values of the resources which have been created.
- backend.tf: The backend file consists of the definition where the Terraform state file should be saved.
- provider.tf: Terraform works with public cloud providers such as Azure/AWS/GCP provider. The details how to authenticate to the Azure API via Terraform are stored in the provider file.
- terraform.tfvars: The values for the variables used in our configuration are stored in this file.
- variables.tf: The definition of the variables used in the Terraform configuration.
- resource-specific.tf: The actual configuration of what we will deploy.
3. Authentication to Azure API
The recommended approach to execute your Terraform configuration against the Azure API is by leveraging an Azure AD service principal. To create a service principal, open the Azure cloud shell via https://shell.azure.com. This service principal will be used to create/modify/delete resources in Azure. Hence the reason why this service principal account will need Contributor rights on our Azure Subscription.
# Retrieve the subscription ID
az account list --output table

# Create a service principal with Contributor rights to our subscription
az ad sp create-for-rbac --role="Contributor" --scope="/subscriptions/0000-0000-0000-0000" --name="sp-p-terraform"
The output of ad sp create command will be used in the next section.
4. Variable Definition
We will now add the details of our Azure AD service principal to our terraform.tfvars file. To make it easy, you can use the following commands:
ApplicationId=$(az ad app list --display-name sp-p-terraform --query [].appId -o tsv)
TenantId=$(az account list | jq -r '.[].tenantId')
SubscriptionId=$(az account list | jq -r '.[].id')
echo -e "Subscription_id : $SubscriptionId\nClient_id : $ApplicationId\nClient_secret : only visible at creation time, not retrievable afterwards\nTenant_id : $TenantId"
Now change “–REPLACE-ME–” in our terraform.tfvars example file with the output from the commands above.
subscription_id                 = "--REPLACE-ME--"
client_id                       = "--REPLACE-ME--"
client_secret                   = "--REPLACE-ME--"
tenant_id                       = "--REPLACE-ME--"
5. Terraform Azure Resource Provisioning
5.1. Storage Account
Our first folder contains the necessary configuration to provision an Azure Storage Account. We avoid to use hard-coded values in our configuration and prefer to use variables.
Enter into the first folder and use the following Terraform CLI workflow:
terraform init
terraform plan
terraform apply
The storage account gets created with the following output.

Copy the Access Key from the output into the backend.tf file of the different folders 01_backend/02_vnet/03_law. Each backend file now contains a specific key per Azure resource and the Access Key of our Azure Storage Account.
5.2. Backend configuration
Now we will make the switch from local state file to remote statefile.
Move into the folder 01_Backend and run the command:
terraform init -backend-config="backend.tf"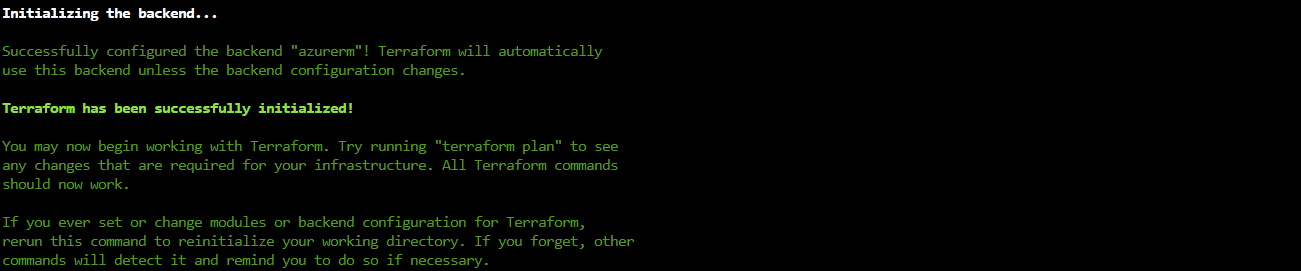
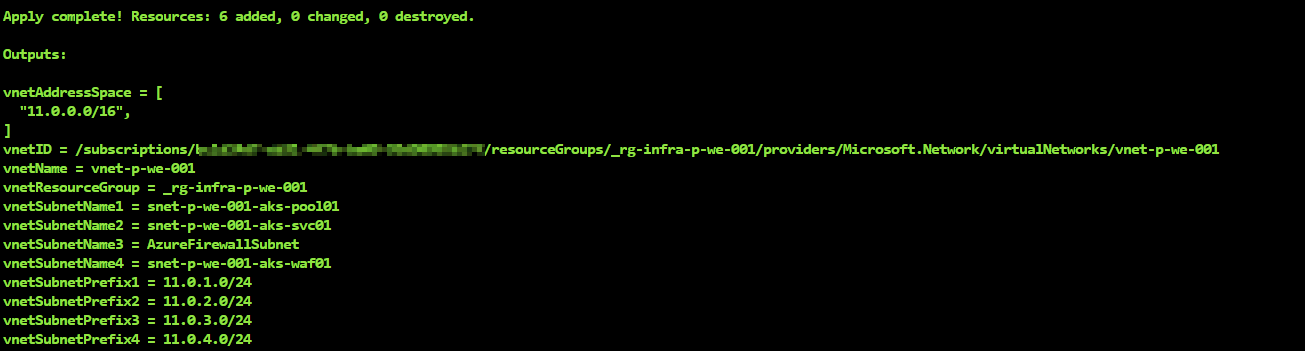
5.3. Virtual Network
Move into the folder 02_vnet and run the same workflow as before (init-plan-apply).
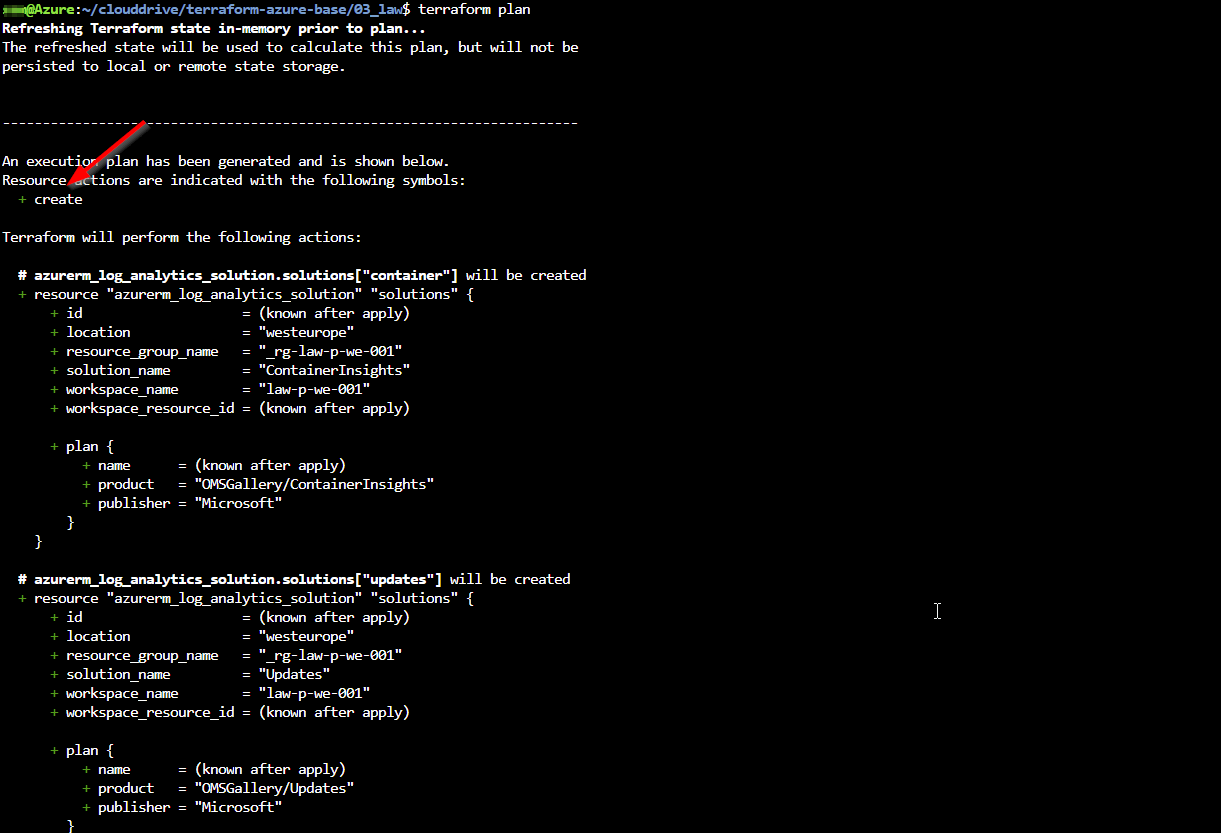
5.4. Log Analytics Workspace
Enter into the folder 03_law and run the same workflow as before (init-plan-apply) to create the Log Analytics workspace together with the two solutions.

Embracing any new technology is a journey of learning and experimentation.
The configuration we used in this post can be found on https://github.com/dewolfs/terraform-azure-base.